Thursday, December 27, 2012

Kid Silhouettes

Between my two oldest sisters, I have seven nieces and nephews: Claire, Emma, Luci, Joe Joe, Matthew, Becket and Helen (in age order).

For Christmas this year, I decided to make their silhouettes as the Christmas gifts for Margot and Dan, and Mari.  After scouring the internets/blog-o-sphere for inspiration, I realized most people use their Silhouette machine or Photoshop, which I don't have, so I just went about it the old fashioned way.  I found this blog's tutorial the most helpful.

A few months back, I asked the parents to send me profile shots of their children.  Mari sent them back first and they were exactly what I was looking for.  So I sent those examples to Margot and Dan, and they sent me back great images too.  I didn't tell them what I needed them for, but they may have picked up on what I was doing (although I never did ask them that either).

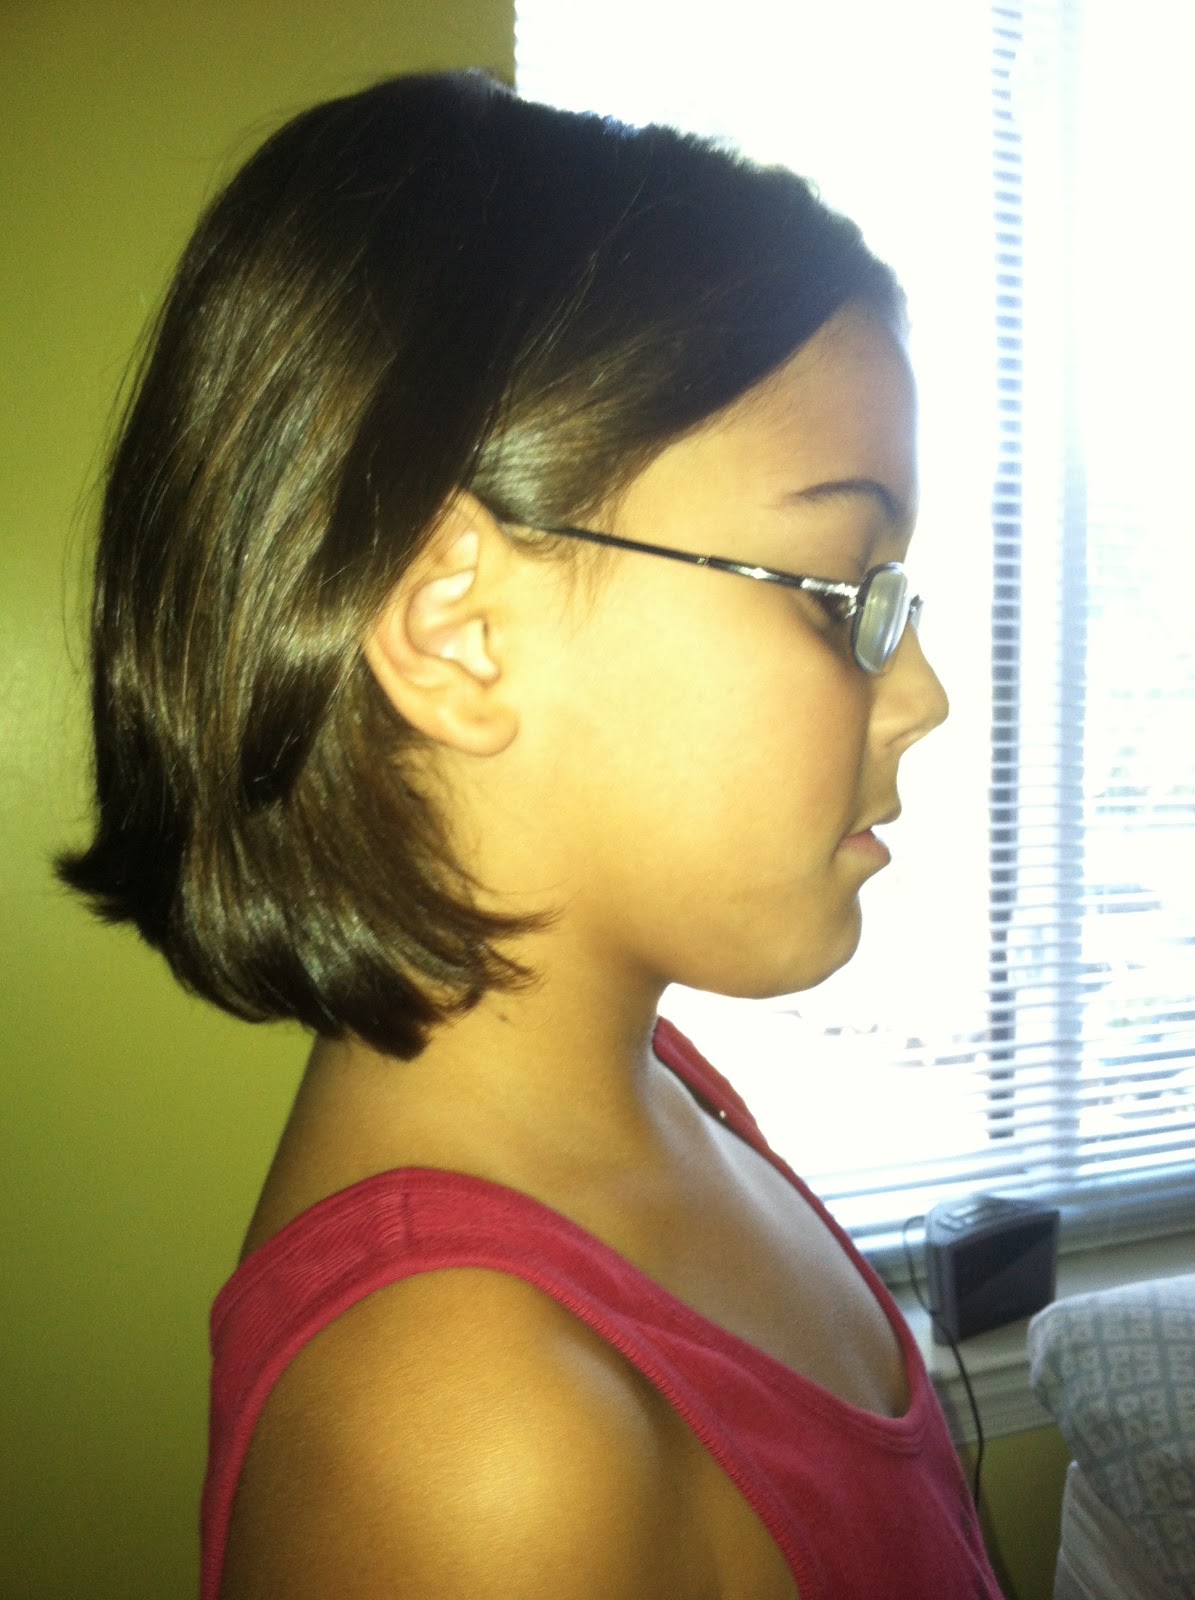
Here are the original photos.


I printed them out as 5x7 photos regular white paper and regular computer paper.  Once printed, I traced the image, adding some extra detail like collars, bows, etc., as the aforementioned blog had done, and the result was great.  Truly, it is these little details that make so much of a difference.

I wanted them all to be a similar size (which they were not), so after cutting them out, I photocopied several and recut them, until they were nearly the same overall size (you'll see in the end result that they don't necessarily look to be the same size, as their widths are different, etc., but overall, they are).

Below you can see the traced image and the added back collar. 


Here are all seven cut out, but before they were resized.  See how Matthew's is much larger than his brother, Joe Joe's?
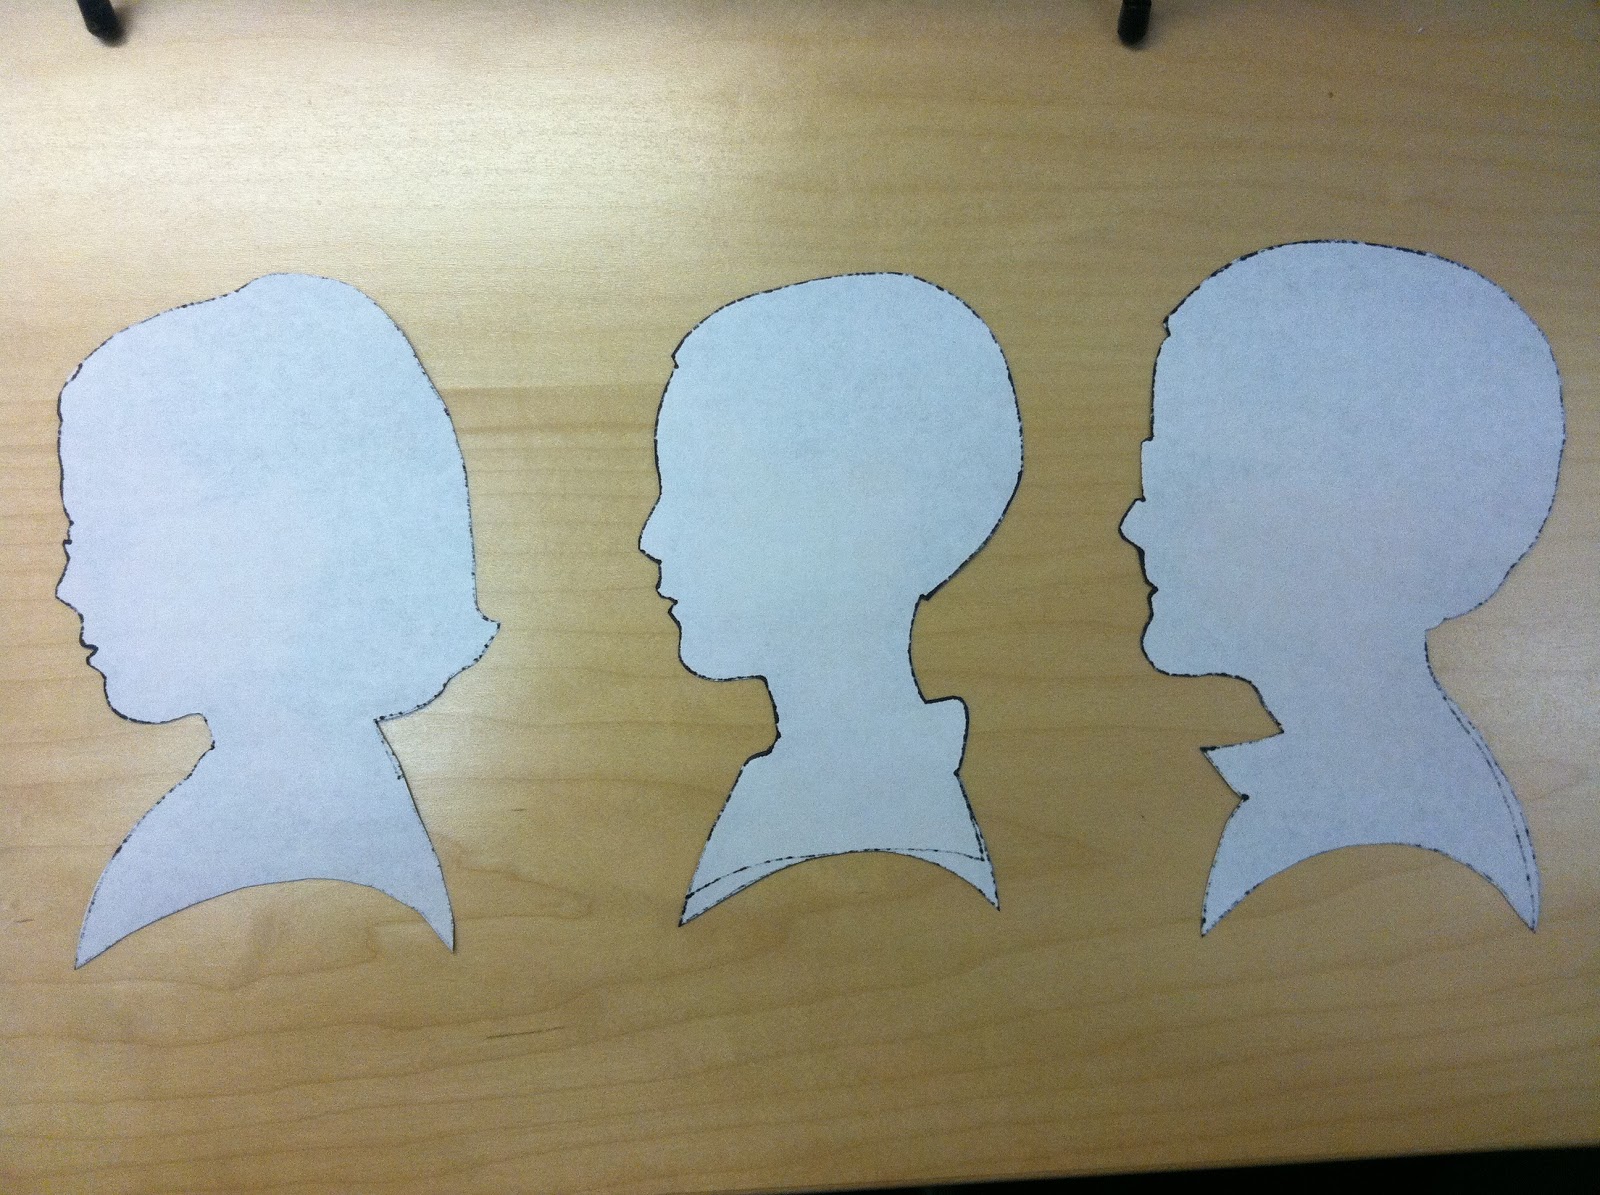
The Martinez Kids

This one shows the major differences in the rounded bottom part of the image.  In the end, I ended up like the way Becket's looked best (third one down the line -- and the only boy), so I used his as a template and adjusted the bottoms.

The Geary Kids

Then I headed on over to Paper Source in Georgetown.  This store is so adorable, I could have spent hours in there.  My original plan was to use different paper as matting for each little one, but once I found this multi-colored, mini-chevron paper, I knew I would use it for all of them.  It was muted, but colorful, playful, yet not over the top, and would work super well for both girls and boys.  I also picked up black cardstock to use for the actual silhouette.

Then...I got a little sidetracked.  With only a few days until Christmas, I headed over to Mami and Pops' house in Oakton to prepare the house for Christmas morning.  We put on our aprons (Mami's was a gift from Margot; mine was a Marshalls find too good to pass up) and got to work.


Mami and I set the tables, including the Becket and Helen's table...


And we baked like crazy people -- four coffee cakes and a batch of pecan balls.  Don't even ask how much butter, sugar and flour that is.  But it was so delicious.

Then we headed out to grab the finishing touches for gifts or cooking that we needed, including seven frames from Michaels for the silhouettes.


After gathering all my supplies, it was go time.  I carefully cut out each image onto the black cardstock.  This wasn't "difficult," but it was stressful.  I wanted to be sure to capture every little detail, so it felt like I didn't breathe while I was cutting them out.  After each one I would take a big sigh of relief that I didn't totally mess up the entire project, and get to work on the next one.


Then, using the paper cutter I had bought for the Christmas cards, I cut the background paper to fit the frames from Michaels (I used the matting, adjusted slightly, that came with the frames as my template).


 While I'm doing all this, Mami was chopping stuff for the Kidney Stew and Pops decided to make us some Manhattans.


After cutting out all of the silhouettes and sizing the background paper, it was about 10 p.m., so Mami, Pops and I decided it would be a good time to eat some dinner (a little late for dinner, but hey, we're Cuban).  I called it a night and we ate while watching Muppet Family Christmas, and eating some delicious baked cod with tomato, capers and onion and some tasty quinoa and broccoli.  We had an early Christmas Eve morning ahead of us.

I woke up and after some morning joe, immediate got to work finishing the silhouettes.  After some discussion, we decided they should all be facing left, despite the photos originally having them facing right.  I used an Elmer's mounting glue stick to attach the cut out black cardstock images to the mini-chevron stripe background pages and placed them in the frames.

Here they are, in age order again.


In family groupings:


And all together.


I am really happy with the way they turned out.  I would definitely do this project again for others or just as an update for my sisters.

Merry Christmas!

Thursday, December 13, 2012

Another Easy Holiday Craft...Hosts Gift

Alina's McMansion hosted a holiday soiree last weekend, and as a (very minor) thank you, I thought to personalize some beer coozies for the four hosts.

I had bought these little Santa boot coozies two or three years ago from the Oriental Trading Company and still have so many left over.


Just took some white puffy paint and added each of their names.  Let them dry for a day, then flipped them over and added "2012."


They aren't much, but it was nice to bring them just a little something....

Christmas Card - Finished Product

Well...the cards have been sent out, and if you haven't received it yet, blame it on the post man!!

So, here's what I did.

I knew I wanted to a simple design, especially since I was designing them myself using only Microsoft Word 2010. 

I started by getting a cute stitching border in the right size and color, and spacing out the page to have four equal parts.


I already knew what I was going to write, so I found a font and size I liked, built out the shapes I wanted and...


Here's a close up of one (although it's still not very clear).  It reads "Hang a shining star upon the highest bough..."


Then we move to the back.  Continued with the simple is better theme and here's what we've got.


"...and Have Yourself a Merry little Christmas now".

Then comes times to cut, jazz up, sign and send.  So ran to Michaels and Staples to grab a paper cutter, some gold glittery stars, and proper sized envelopes.  Gathered supplies (including a tasty Pumpkin beer -- this was over Thanksgiving weekend, afterall...) and got to work.


Here they are cut and ready for a quick personal note and some fun, multi-size stars!


And here's one jazzed up and ready to go (I had switched to warm cider by now).


They were so fun to do.  I wonder what next year's will look like...


And just for fun, here's a picture of the Dixie girl with Auntie Fee in matching field coats.


Makes me smile everytime I see it.

Tuesday, December 11, 2012

Temporary Break from Serious for Fun

I've been a bit in a serious/pensive mood these last few days, which has made it somewhat difficult to blog.

So I thought: until I am ready to share my concerns, I'll share something fun instead.

Photo Credit: Muffy Aldrich from The Daily Prep


Not sure it gets any better than that...


Thursday, December 6, 2012

Blog Design Commentary and Easy Christmas Craft

Well, I am attempting a new blog design, but I have much to learn about how to customize the page.  For example (and for starters), I'd like to center the image and blog title, as well as figure out why the date header is so unclear with this new font.  Minor things, yes, but my hope is that the more I use this as a outlet for my ideas or to showcase my pastimes, I will also take an interest in learning how to manage the blog.  I think it involves coding or CSS or something.  I am very clearly starting from scratch on this one, so be patient!

Back to the fun stuff!

I made a super easy Christmas decor item after work but before heading out for a night on the town with some lady friends on Friday night.  I think it turned out cute!


So while doing some shopping for supplies for other Christmas gifts/crafts  at Michaels, I stumbled upon when scrounging through the dollar bins and saw two cute little wood cutouts covered in red, textured fabric.

Here's what I started with:

(This picture is upside down)

- two "Merry" signs from Michaels
- green scrapbook paper in (mine had cute lighter green polka dot blobs on it)
- pen/pencil
- paper cutter
- Ikea white Ribba frame (mine was leftover from a project a few years ago)*
- glue
- glass of Cabernet Sauvignon

I traced the interior piece of paper from the ribba frame on to the backside of my green scrap book paper to ensure the perfect fit.  My paper happened to be double sided -- truthfully I bought the least expensive green paper that I thought was cute -- this one was on sale.


(This one is upside down too)


Use your paper cutter to get straight lines and make sure it fits in the frame.


Finally, place your signs, measuring your margins, then take some glue (really any kind will work here), and stick 'em on!

Place in frame, and Whala!


I put it on my entry way table/dresser.

Merry Christmas!


*Side note from author: Normally I get so irritated (read: jealous) when I read my crafting blogs and these fine crafters say something like "Oh this old thing that was laying around?" and they are referring to an amazing side table or dresser or anything, really.  I think this is mostly because after living in 7 different apartments since 2009, I rarely keep things "just laying around."  So sorry to be a hypocrite here, but I was STOKED to use something I had "just laying around." 

Wednesday, December 5, 2012

Lights, Ornaments, Action!

I'll update with some specifics, but just as a tease...

Ladies and Gentlemen, the 2012 First Place Tree:


Notice the Dixie girl hanging out in her basket...